1986 - The Megapixel Sensor, Analog vs Digital Path Forward? |
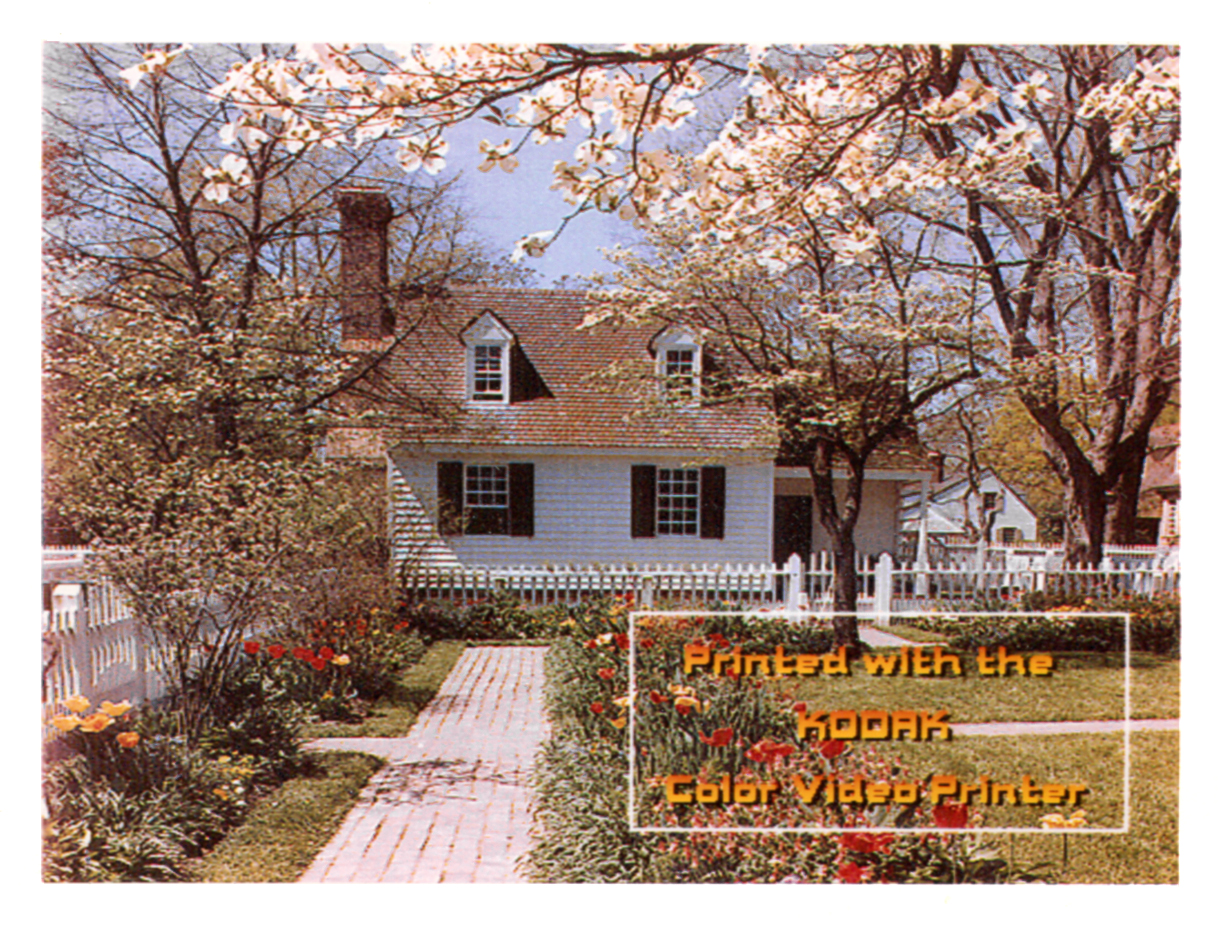
Polaroid Suit Decision on Instant FilmThe year 1986 began with a bang. On the 6th of January Polaroid Corporation won it's suit against Eastman Kodak for allegedly infringing on patents relating to their Instant Print technology. Just so happens that the video printer we were developing was based on that very same instant film technology. In any event we had to immediately cease and desist from any further development on the instant print video printer... and that was the end of that project. It was to be just the first of many project deaths I would witness during my years at Kodak. That however, didn't stop a group of us from cobbling up a 35mm camera back to our little video printer and presto chango turning it into a 35mm film recorder. After demonstrating that it might work, we got approval to work for a few weeks on a proposal. We drew up some designs and did a little market research. There were very few "slide printers" around at the time, there was one from Polaroid, one from Beseler and one from a small company in California, called Dunn Instruments. The Dunn Instruments unit was the only one priced under $5000 dollars, and we were shooting our product for the $2,000-$3000 range. Various market research estimates had projected an increase in the use of slides for presentations due to the new capabilities that PC's provided, when combined with new graphics and business applications. We felt confident we could resurrect the project and succesfully target this new niche so we assigned it the apt codename, "Phoenix". Sales and marketing didn't buy it. They said that they would only be able to sell a couple of units a year, not even enough to pay the startup costs. At this same time a new device from Sony had just showed up in our conference room, a brand new gizmo called a video projector. It could project video or computer graphics onto just about any wall or screen. Although we might not have realized it at the time, that was pretty much the death knell for 35mm slides, and our new idea. It would take me a few more years to discover that unless sales and marketing felt they could sell thousands of units in the first year, they would be reluctant to take a risk on anything new, especially something they didn't understand. With film, it wasn't a hard sell, it was more like order taking. This was an entirely new business model and product line, it was going to take some educating of the consumer to win them over to a new technology. Other Big Introductions in 1986Kodak announces 1.4 Megapixel sensorThe biggest announcement of the year had to be Kodak's introduction of the first Megapixel image sensor. The first sensor with more than video resolution. It would be awhile before Kodak could make them in quantity, but I saw it as the basis a bunch of new digital products from cameras to scanners. Apple Annouces Macintosh PlusA big leap forward for Apple was the announcement of a new machine with a minimum of 1 megabyte of RAM and upgradable to 4 Mb of RAM. This would allow software developers much more room to code apps. As a result more sophisticated and powerful applications could be created. Iris 3047 Color Proofer Announced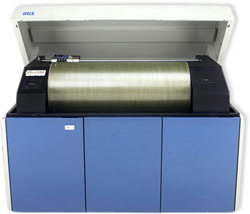 The Iris Color Proofer was the first ink jet printer considered good enough for fine art reproduction and digital image printing. It contributed greatly to the development of the digital art form. Archival inks were available and it printed on a variety of papers. The IRIS is a continuous flow ink jet printer. Continuous-flow or "hertz" inkjet printers pump a continuous stream of electrically charged ink droplets (more than four million per second) at the paper. A magnetic field is used to control ink placement on the page, unused ink is directed to a recovery reservoir. Continuous-flow inkjet printers were used for several distinctly different types of applications. The high speed, low resolution variety are used in appli- cations such as product identification, personalized direct mail and addressing catalogs and magazines. 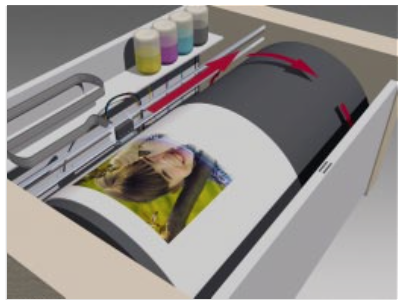 Paper is wrapped around a drum that spins. The nozzles move down the paper spraying the ink onto the paper. The high resolution, low speed printers such as the IRIS series by Scitex are used for proofing and fine art printing. IRIS printers can produce multiple spots per dot and can achieve effective resolutions of up to 1800 dpi. Due in part to the great number of paper surfaces that it can print on, (espe- cially heavier weight, fine art watercolor papers) the IRIS has become one of the most popular printers for fine art reproduction. These prints are often referred to as GiclŽe (pronounced ghee-clay) which is really just a fancy French name for inkjet. GiclŽe prints made using the latest archival inks have been tested to have a display life of up to seventy-five years and perhaps even longer. Pagemaker 1.0 AnnouncedThe most heralded software product of 1986, had to be Aldus Pagemaker 1.0. This was the spark that set off the Desktop Publishing Revolution. The first page layout program for the Mac. You could now combine text and images into a multi-page document for books, brochures, newspapers or magazines. Text could now flow around your images. You could kind of do this with the word processors of the time, but Pagemaker used Adobe Postscript the language for communicating with imagesetters and LaserWriters. It was a true WYSIWYG layout program, just what was needed for those new LaserWriters. I think that this one software announcment confirmed that there was now a great need for devices to turn analog images into digital formats, for use in this new application. A number of companies in Silicon Valley recognized this, ads for video digitizers and new scanners started appearing in the Mac magazines. Kodak still had nothing to offer this market. I had a copy of the program but didn't do a lot with the first version. MacPaint and later MacDraw were sufficing for most of my illustrative and layout needs. As I recall, the first version had some bug issues, or maybe it was just that it was a new paradigm I wasn't used to, yet. Consumer Electronics Division becomes the Electronic Photography DivisionI believe it was in the spring or early summer of '86 that the name change took place. The focus was now on the new Still Video Floppy standard and a line of Still Video products. To replace the Instant Film Printer a new thermal dye transfer video printer was added to a lineup that included two SVF player recorders (a single disk and a multidisk unit), and a video transceiver. The Systems GroupWham, bam, thank you ma'am and another project bit the dust. Not even through the first quarter and already two projects shot out from under us. It turned out that I had only been on loan to the printer team. Now the lease was up, I was going to have to go back to the "Systems Group". We were a small team within the Advanced Development group that provided measurement, statistical, qualitative comparative testing and image simulation capabilities to Advanced Development .The Advanced Development team comprised some of the company's best, managers, video, mechanical, electrical, software and systems engineers, industrial designers, image scientists and technicians whose responsiblity was to take new technologies and turn them into products people might buy. The members of this team would shape digital imaging at Kodak for years to come. The Systems Group was also responsible for ensuring that our various new electronic products worked together as a system. This last directive was partially accomplished by promoting the use of well established standards or when all else failed trying to promote new standards. One of the toughest issues I would have to tackle during the year was getting the various product managers to all agree on the same type of video connectors on the back panel of each new product. My Activities and Goals for 1986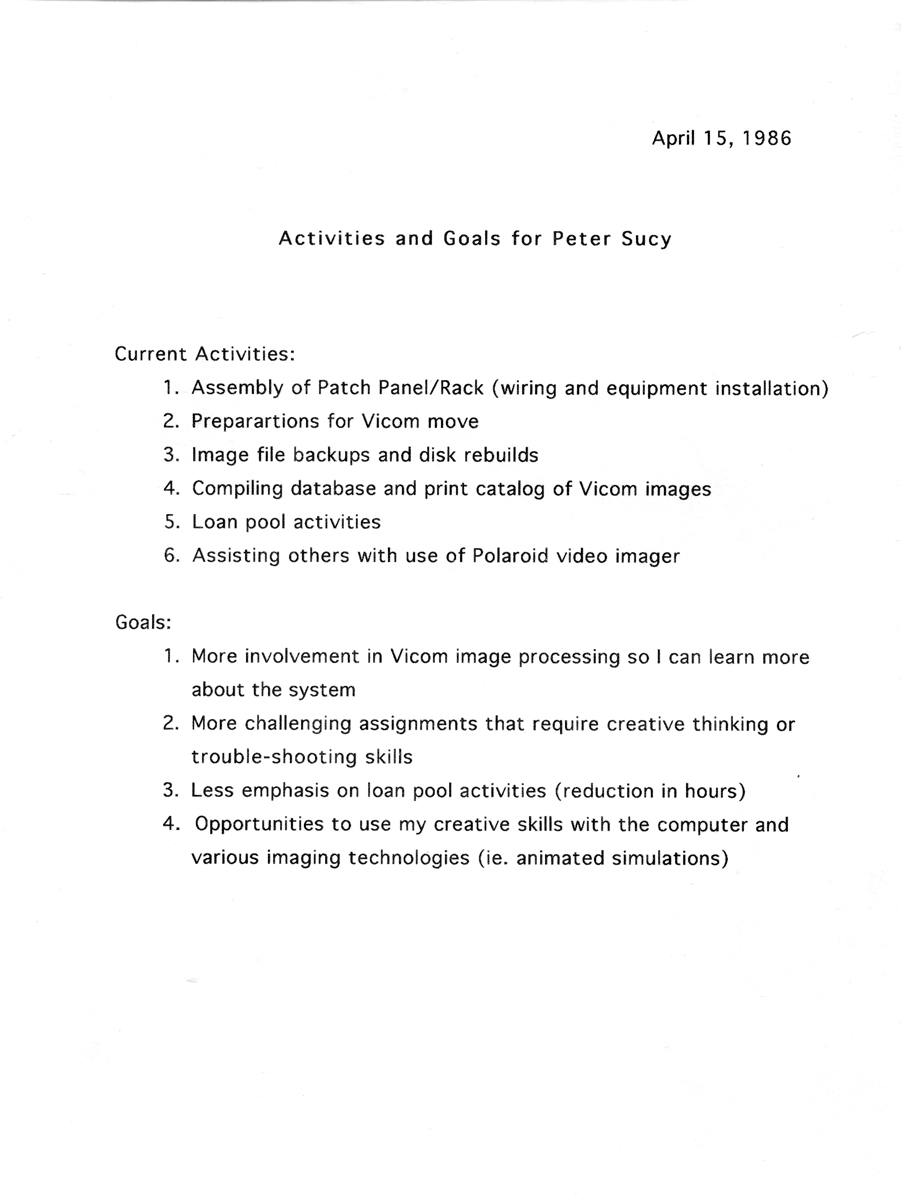 The Vicom ComputerOne of the major assests of the Systems Group, was a sophisticated (at least for the time) image analysis and simulation computer. The VICOM computer as it was called, was actually based on the Motorola 68000 microprocessor. Coincidently, the same microprocessor as resided in my lowly Macintosh 128K at home. 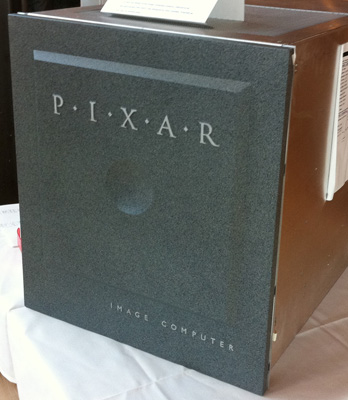
The VICOM computer however, was also equipped with six frame buffers for storing video resolution images and a large library of algorithms that could be applied to any one or up to all six of the individual frame buffers' contents with just one, easy to type, twenty-something character command. User friendly the VICOM was NOT, but I realized that if the processor in the VICOM could do image processing why couldn't my Macintosh. I reasoned that before too long there would be color Macintoshes, color software programs that would let you manipulate images the way you could with the VICOM and possibly do much more. I would frequently suggest this possibility to the image scientist responsible for the VICOM computer, he would laugh and tell me the Mac was just a toy. Later in the year Pixar bought Vicom and the Vicom was upgraded to a PIXAR unit with the funky granite like front faceplate. The Image Simulation LabIn addition to the VICOM computer, which consumed a major chunk of the real estate, the Image Simulation Lab contained a wide variety of video equipment. VCR's, cameras, videodisc players, video signal generators, sync generators, RGB to NTSC and NTSC to RGB convertors, waveform monitors, NTSC and RGB monitors, a Polaroid video printer/film recorder and so on. And taking up one corner of the lab was this prototype workstation that was designed to transfer film (slides or negatives) to still video disks. This PhotoTransfer Station was the precursor to the PhotoCD Imaging Workstation or PIW. I believe this device used a 3-tube video camera for imaging the film, which was way overkill for recording on Still Video Floppies.
My first assignment with the Systems Group would be to figure out a way to conveniently hook up all of this various gear in the lab to the VICOM computer frame buffers. Not having much more than a year's experience with video, this seemed a daunting task at first. I didn't really even know what most of these things did. So I listened and asked questions and probably became a pest but when I knew enough about what each piece did, I decided that they could all be split into several basic types by function...  Many of these devices had multiple connectors for RGB and S (sync) cables, with pass throughs, sometimes multiple input connectors or output connectors or both. In order to sort this mess out in my mind, I decided to use MacPaint to draw a picture representing each piece of equipment along with a picture of all the input and output connections on the back of each piece. This way I could just draw lines to connect the various inputs and outputs and also determine what was missing in order to glue it all together. I developed the patch panel layout above at home using MacPaint (working sideways to create a portrait page) and brought the printed results into my supervisor. He was fairly impressed. A Mac on My Desk at Work and All Kinds of Diagrams to MakeIn fact, Andy my supervisor, was so impressed that soon I had a Macintosh Plus of my own at work. This at a time when very few engineers had computers at their desks. He had quickly realized the power that visuals had when attempting to convey complex concepts, especially to marketing people. He also did much to encourage my interest in the development of new products and the application of new technologies. Computer Applications for Still Video System Products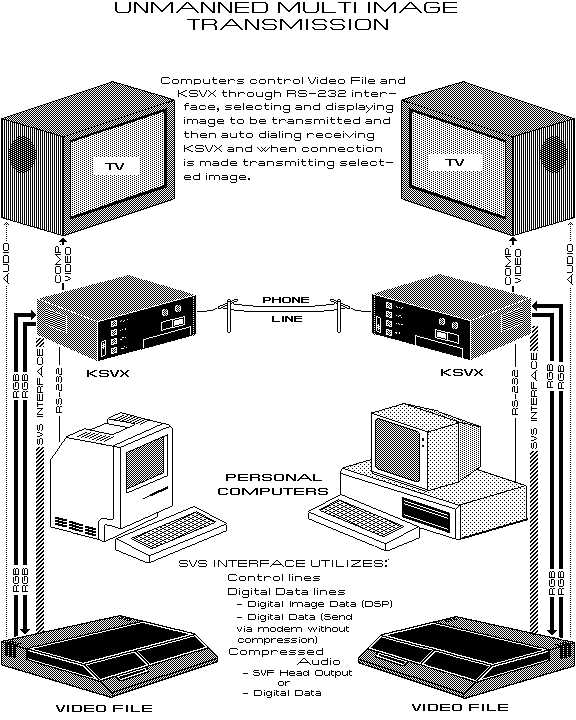  Click Image to View (requires PDF plugin) or Downlad a PDF of the full Brochure I was asked to create diagrams of as many computer applications for our SVS products as I could think of. I spent nearly a month creating Computer Application Diagrams for all the various still video products showing different configurations and cabling diagrams. You'll notice all the documents are in portrait mode this meant creating every diagram rotated 90 degrees on the screen and I could only see part of the image in the tiny monitor. I began pleading for a larger monitor around then. Not everybody had figured out that nearly all of our new Still Video products had computer interfaces that would allow them to be controlled or even transfer images to the computer for editing or adding text. These diagrams would show the potential applications of our products when hooked up with the proper software. The primary goal was to get funding for software development, the secondary goal was to expose marketing to potential applications for the products. I soon discovered that the head of marketing hated computers and had been quoted as saying that he did not want Kodak to become a computer peripheral manufacturer. As if that were something bad! That however, gives you some insight to the prevailing attitude among upper management that new technology was threatening the cash cow, "silver halide film". With Kodak's double digit profit margins on film, only pharmaceutical company products had better margins. In hindsight they were probably right, however, as I saw it the technology was going to come no matter what, you can either stick your head in the sand or adapt. SVS RGB Connector Report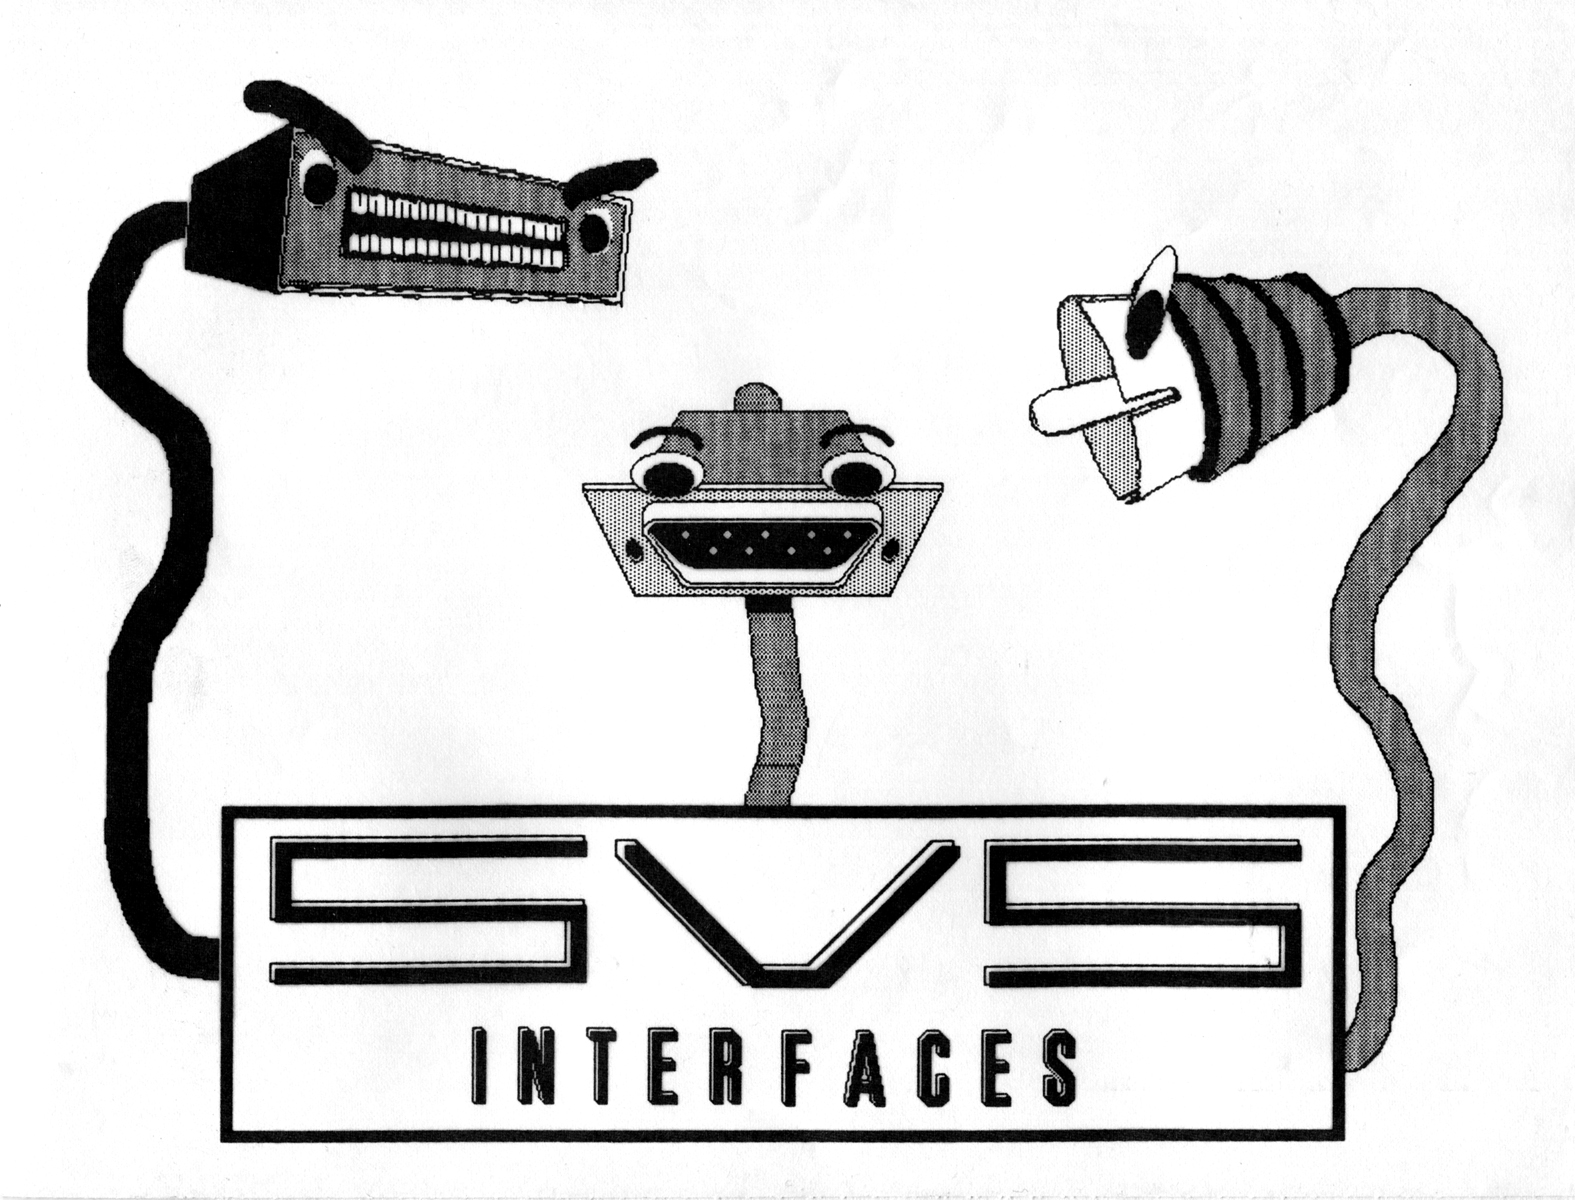
My supervisor asked me to research and suggest one standard RGB connector for all our products. The current iteration of prototypes had 3 different configurations. Putting separate RGB & Sync for both input and output on some devices required a lot of rear panel space. Products like the Multi-Disk Recorder didn't have much room and I foresaw a cabling nightmare trying to hookup several devices at once with RGB & Sync cables. Andy also suggested I come up with a cover image to get people's attention (above).  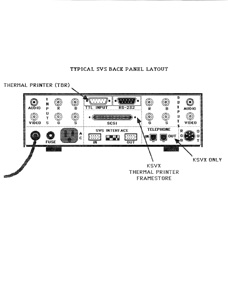
 Click Image to View (requires PDF plugin) or Downlad a PDF of either Report or Note I did a survey of all the OEM RGB products in the various labs to see which connectors they had settled on. Originally, I had recommended the DIN connector, but after we ordered a few we discovered they were not very robust. The connector that I then recommended was found on a Panasonic RGB monitor in one of the Camera labs. It had a very solid single 8 pin connector with a robust mating lock. This was the one I then recommended, but would take a lot of heat for doing so. The cables they had made with these were terrible, wires unsoldering, breaking etc. and this caused lots of problems of course. Quite a few people blamed it on my choice of connector. I rather think it the problem was with the lowest bidder that they had selected to manufacture the cables, so they could save a little money. Marketing and sales were not eager to increase the costs of the products anymore than they had to. I argued that not providing them was a mistake. Bigger Monitors - MegaScreenMy neck and my eyesight were starting to suffer from doing document layouts on the tiny 9" Mac monitor. I asked Andy if I could get a larger screen to work on, he said yes, of course. I ordered the MegaScreen (or one similar, I had this ad in my file though), a 19" monster of a monitor for the times. I would get kidded about it, but it sure made working in Pagemaker a lot easier. 
The SV7500 Multidisk Recorder Tiger Team
As a member of the systems group it was our job to deal with issues relating to how the various products we were developing might work together in a system. At this time we had several products in the engineering model stage and could start trying to hook them up. One of the more complex products was the SV7500 or multidisk recorder, this product was an image storage device that used the Still Video floppy standard. The multidisk recorder held 30 still video floppies and could randomly access any of up to 50 images on each disk in the tray. The multidisk recorder was simple in concept, but trying to control it with the remote was a real nightmare. There were more than 50 buttons on this thing including the alpha-numeric keypad inside the hand grip. And the system menus were overly complex and modal. My boss asked me to participate in a Tiger Team to help redesign the product interface, most probably because of my drawing abillity. I think he felt my visuals would help the team deal with a very complex task.  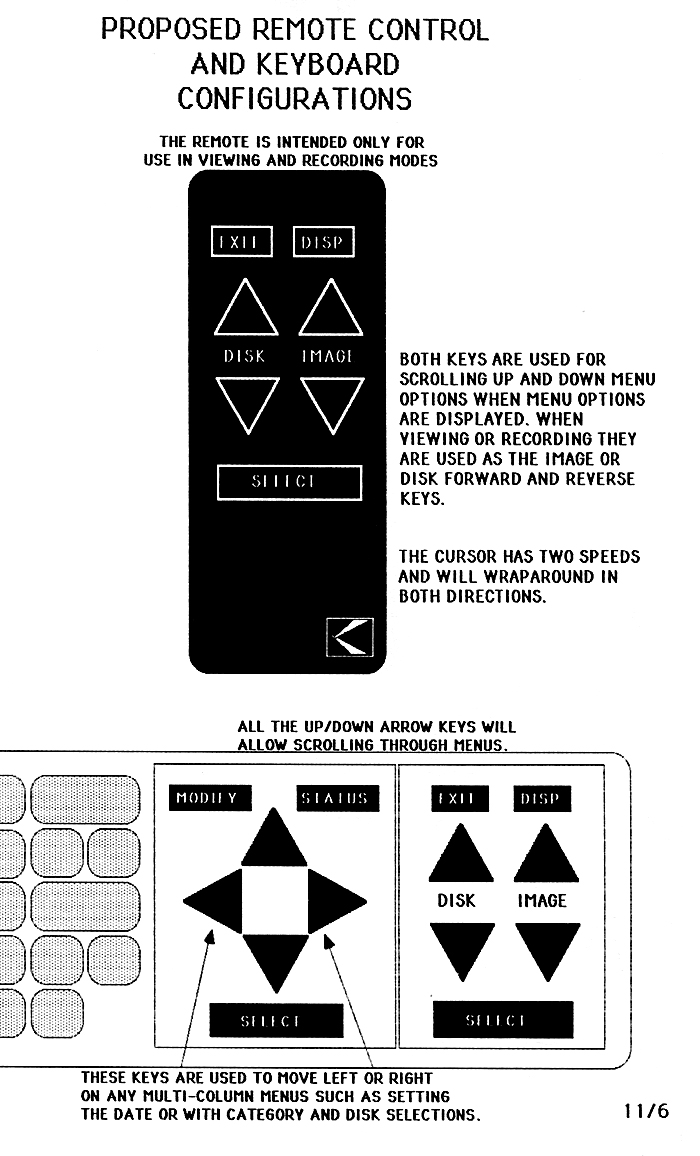 First Remoter w/Mods VS Proposed Phase II Remote.
Click Image to View Larger Image Menu Interface Re-DesignsThe Mac had made me much more aware of user friendly interface design and I felt it needed to be applied to this product. The first task we tackled was to redesign the remote so that the button groupings were more ergonomically placed. After several meetings I took the proposed layout and drafted a MacPaint document of the new layout. The illustration helped us confirm our decisions and communicate the decisions to the manufacturing team. Unfortunately, that would be the extent of what we could do to improve the hardware on the first generation product with the time we had.  We did however have time to change some of the software. Working with the lead software engineer on the project, He and I worked and reworked the menu structure and the features to simplify and streamline it as much as possible within the confines of the current hardware. I illustrated each and every menu screen using MacDraw. The engineers with cubicles around the noisy Imagewriter printer were not too happy with me. I think that may have been the reason we soon had a Laserwriter printer in the department. One of the drawbacks I discovered was that the device could not differentiate between disks, so if you moved them around in the tray you would lose the information associated with it, because it was associated with the slot. For the next generation, I suggested place a barcode reader in the tray and find a way to put barcodes on the disks themselves. 
Click Image to View Larger Image For the next version of the Multidisk Recorder we had developed a list of features that would hopefully make the product much more flexible and easier to use. I imagined the "Imagemaster", as we had dubbed it, to be one of the first programmable presentation devices. Sort of like having two slide projectors and a programmable controller only with video images. The remote in this new version would be reduced to about 8 buttons, a real keyboard would be built-in and it would have plug-in personality cartridges that would store different software programs. Unfortunately that device would never be built. After working on the Tiger Team I decided it wasn't worth the money, so I dropped out of the MFA Interactive Development program. I was learning far more at Kodak and they were paying me.The Control Center ConceptBy August I was working on a solution to a problem I had uncovered doing my system charts for the Still Video products. It wasn't really a system yet, and it was still very complicated to setup any configuration just with the three devices. Especially one that would let you transfer information between the two "storage" devices, the SV9600 transceiver and the SV7500 SVF videofile, without recabling each way.  Click Image to View (requires PDF plugin) or Downlad a PDF of either Report or Note It became evident that some sort of switcher was going to be needed. A switcher would allow a number of input devices, such as video cameras, VCR's and laser disc players, to be cabled to it and then allow the selection of an input source to send out the back end of the switcher to one of the devices. To really be called a system I had to be able to send the signal from the switcher to all connected devices. I soon realized that to send it to multiple devices I would also need some other box to split it out to different cables, I was told that was called a distribution amp. In order to accommodate both NTSC and RGB inputs on the various devices we would also need an RGB to NTSC and an NTSC to RGB converter, two more boxes. Now we were at four additional boxes to connect 3 devices in a flexible configuration that wouldn't require constant rewiring. The system solution was getting very expensive. 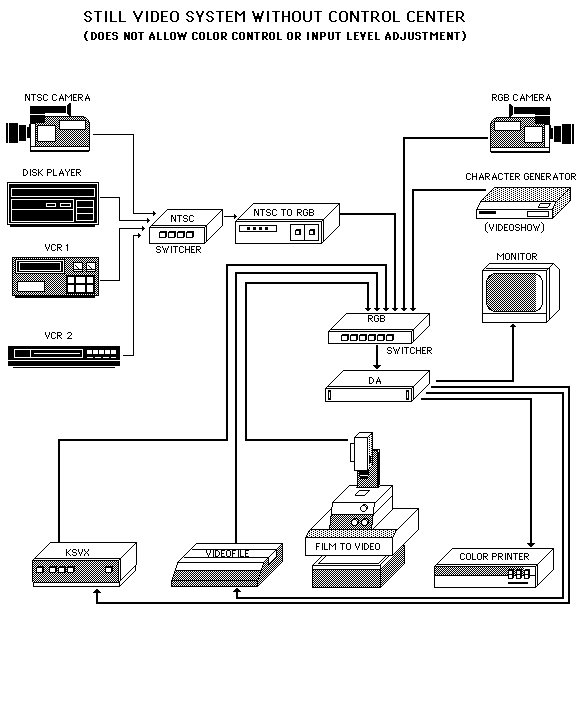
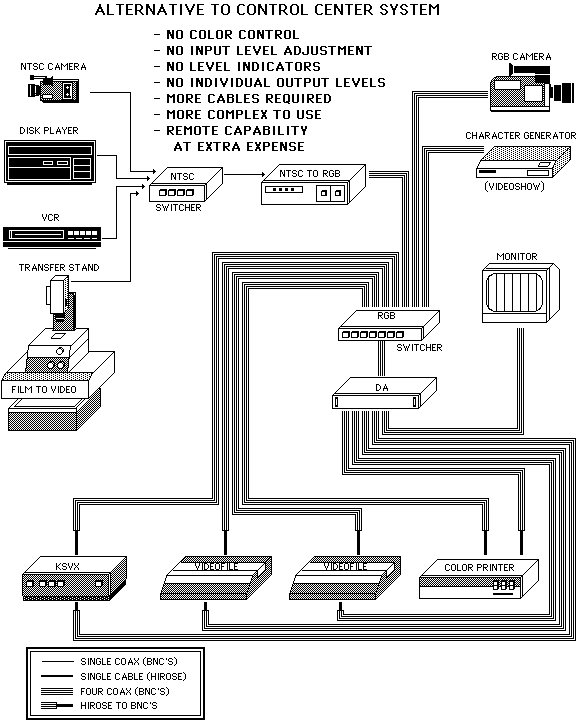
Click Image to View (requires PDF plugin) or Downlad a PDF of either Report or Note My solution was a single custom NTSC/RGB switcher/distribution amp with Hue, Sat and Brightness controls and level meters. A single box to combine the functions of four separate devices, simplify configurating systems, provide output tweaking, reduce cables, and create an easy to use system. I put together a concept called the SVS Control Center. The MacPaint illustrations here were used to present my case and below is the front and back panel layouts. After presenting it to the senior video engineer, he said it was feasible and wouldn't cost much in the way of parts and circuits. We got the go ahead to build one prototype. The prototype managed to get built, but when marketing heard we were trying to develop this, the project was nixed. Although it made setting up and using the SV System much simpler, they didn't believe they could sell it. It wasn't percieved as having value on it's own. The full importance of user interface and ease of use wasn't fully realized in those early days of embedded software. I felt I could bring some of the Macintosh philosophy to software and hardware development at Kodak. Master's Degree Attempt OneIn the fall, I started a new Master's degree program at RIT called Interactive Video Design. Learning how to program a computer to control a videodisc player allowed new levels of interactivity to video viewing. The course would teach us how to design and program these new software programs. A large part of the first semester was dedicated to learning to draw software flow diagrams and learning to program in Pascal. The second semester we had to come up with a proposal for a project for the class to develop in the last semester. We had to produce a concept and flow diagrams for a interactive program. At first I considered a solar system exploration game that used video from NASA satellites such as Voyager, but ruled it out after watching students in the class next to us struggling with film editing. It brought back unpleasant memories of my days in film class there and how difficult it was to have to cut up your originals for editing and as result not having much flexibility in trying different edits easily. MacEditor - A Computer Based Non-Linear Film/Video EditorIr had occurred to me how useful a program that allowed you to practice editing without cutting film might be. Using an iconic interface as a metaphor for editing actions allowed you to pick segments of video/film and quickly and easily shuffle them around. 
Thus was born MacEditor, my proposal for what would later be referred to as non-linear off-line film/video editing software. Possibly the first time such software had been concieved for use with personal computers. There was quite a bit of activity occuring in this field during this time on high end computing platforms. My idea was to create a Macintosh software program that used a film editing table, a film bin, and a Master Reel as the major iconic metaphors. The software would control two or more videodisc players which would contain your video (or film dailies transferred to videodisc). For practice you could use commercial, pre-editied videodiscs and re-edit them in different ways. The software marks the in and out points of a video clip (film strip) by using frame numbers of the videodisc. These clips or strips could be dragged and dropped into the Master reel and even repositioned relative to other segments. As a result of these actions an edit list of in/out points would be created and used to sequence the playback. My earlier work with Computer Application Diagrams prompted me to envision using two players and a framestore to do special effects such as fades, dissolves and so forth between edits. I thought this concept might have real potential but was a bit bummed that the instructor didn't feel quite the same way. He didn't feel it was something the class could easily accomplish. I read some years later that George Lucas had been developing his EditDroid at around the same time. Avid wouldn't release their product until 1989. I decided to drop out of the Master's program after that semester since my work on the Multidisk Recorder Tiger Team was teaching me way more than the course was. I couldn't see the logic in paying RIT thousands to learn what Kodak was already giving me the opportunity to learn while paying me for it as well. Digitizers - Video Input
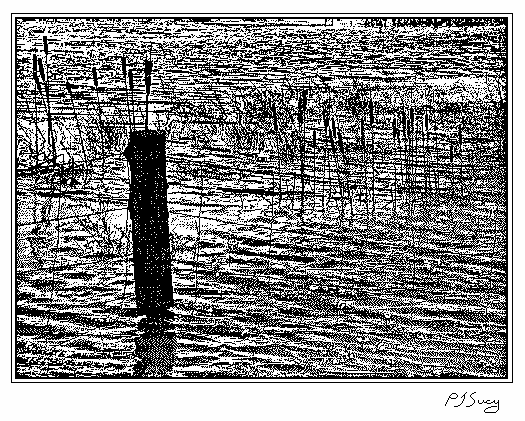
A number of video based digitizers were introduced during 1986. The Computer Eyes digitizer was just one we had an opportunity to play with a bit. It was a small box that connected a video camera to the serial port of the Mac and digitized the video signal into a greyscale image. It was a cool device to play with, because it only scanned one vertical line at a time you got some very interesting effects with moving subjects. As this self portrait, taken in 1986, with me moving my head to try and match the sensor angle as it moved, demonstrates. Analog vs Digital Print ComparisonOne other project I was given during 1986 would give me an amazing glimpse into the potential of a digital future. I was asked to produce a set of comparison prints on the SV6500 thermal printer. The test image would be sourced from a variety of video devices such as VCR's, camcorders, consumer video cameras, a high-end RGB video camera, videodisc players and so on. What I discovered wouldn't surprise many people today but it was a surprise to me back then.
Nearly all of the video images were crappy, especially if they had been recorded on videotape or even worse the Still Video Floppy. the videodisc was only slightly better, but the RGB camera signal was far superior to all because it was digitized directly into the printer framestore without first being stored on an analog medium like videotape. The digitized image could also be transferred to a computer and stored for later printing with absolutely no loss of quality. I discovered that the NTSC standard composite video and analog recording technology really sucked (high signal to noise, artifacts, half frame issues, etc.) and quickly got worse with every copy. That digital image stored on a computer could be copied hundreds of times without any degradation. The thermal prints I made directly from a image from a good camera was vastly superior. Digital image storage, obviously was the only way to go. Here was a system that could produce quality images good enough for professional use. What seems obvious today was not quite so obvious in 1986. Most of the engineers had video backgrounds and didn't really question the image quality of video because it was what they were used to. There was widespread belief internally that people would be viewing photos on their TV in the future. To demonstrate the falicy behind this thinking, I began to show my set of comparison prints to anyone who would look at them. Thus began my campaign to stop EPD from wasting valuable time messing around with analog video based products and begin focusing future development on digital products. I found it was going to take some time to change people's minds. Unfortunately, several more years in fact! A Color Macintosh?
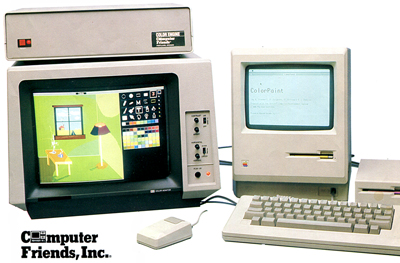
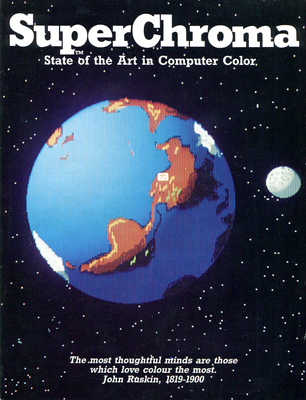
Late in the year I read about the first color Macintosh. Actually, the SuperChroma System was an add-on product for the Mac Plus from a small startup in Oregon called Computer Friends. The SuperChroma System was a metal box with some connectors on the back that could turn your B&W Mac Plus into a Mac Plus with a color monitor. It was basically a video display board that connected to the Mac Plus via the SCSI port and also to a color monitor. Included with the system was an 8 bit paint package that I believe was called MacArtist. looking back it was pretty crude but it was amazing to me then. Another available option was a color thermal wax printer from a company called Shinko. All this for about $5000 including the printer. I told Andy about the system and he told me to go ahead and order one. My job was becoming more fun everyday! The SuperChroma system was slow and the color printer disappointing. The Shinko used a color wax transfer process, so had to be halftoned to produce more colors than the four wax colors. It DID however, help confirm my vision of the future of computing. Pro3D by Enabling TechnologiesThis was a way cool program. A 3D solid modeler, you could do subtracts, and union to make all kinds of shapes. Here's a scan of an ImageWriter printout of one of my images. 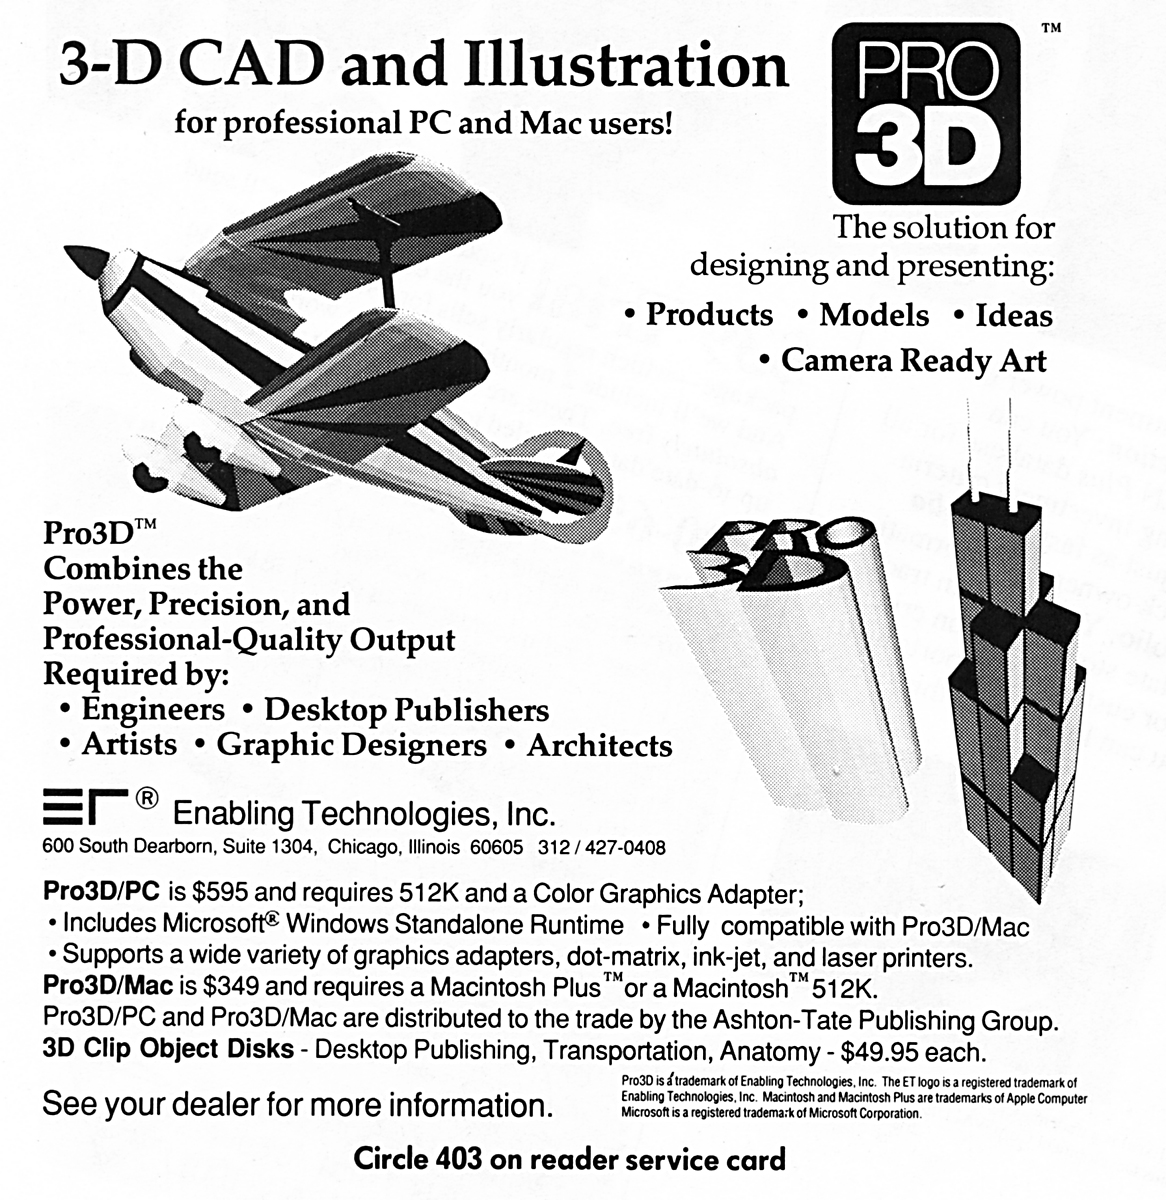 
Accomplishments for 1986 Click Image to View (requires PDF plugin) or Downlad a PDF of Brochure
More to follow... 1987 - Real Color Macintoshes
 ThunderScan of B&W photo. |